How to Wire and Finish a Brimless Hat
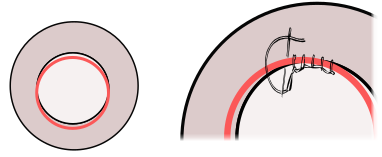
1. Cut a piece of wire to match the circumference of the inside edge of your hat + 3 inches. Overlap the ends by 3 inches and hold in place with a piece of sellotape or by wrapping with thread
2. Starting with double stitch or a french knot, blanket stitch the wire on to the edge of the hat. Allow space between stitches. It should only take a couple of minutes.
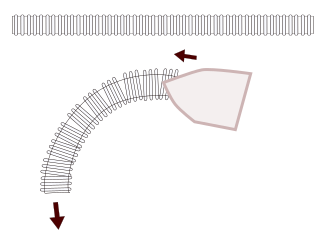
3.Take a piece of milliner's pertersham long enough to go around the inside of the hat and add a couple of inchesTaking a steam iron 'swirl' the ribbon by pushing the iron along whilst pulling the other end gently downwards. This creates a curve.
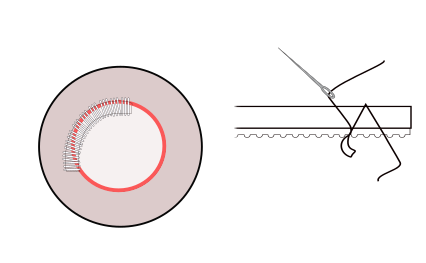
5. Finally stab stitch in your ribbon, by angling your needle through the dip of the ribbon at 45 degrees Turn and angle your needle through the hat at almost the same exit point so that the needle comes out 2 or 3 dips further along. Again angle the needle so tha it enters the same exit point but at 45 degrees. Coming out 2-3 dips along again.
Your stitches should be invisible. If it's a felt hat give it a good brushing to raise the nap.
No so bad really.....Ann
|
Blog SearchPopular Articles
TopicsAbout the Authors |


Your name *